

Edward Scissorhands Costume
Rate this costume:
|
1 vote
| add a comment |
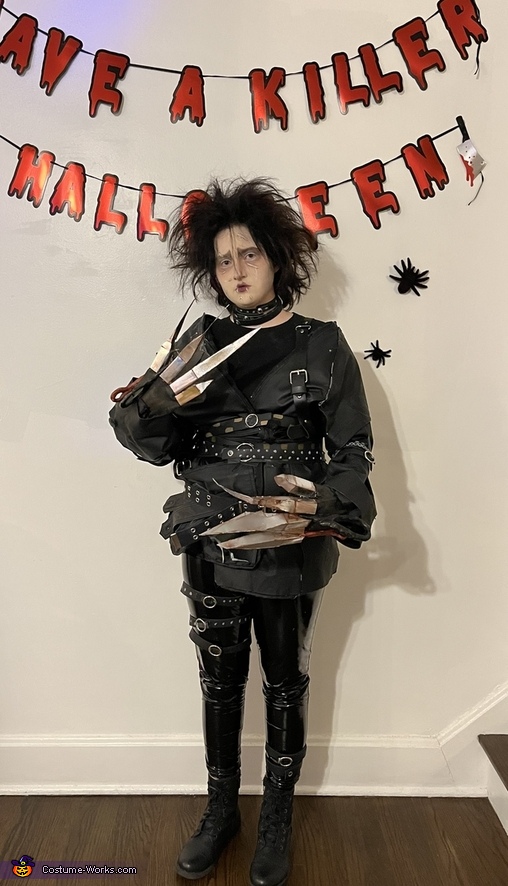
Full body image


| Costume type: | Costumes for Women |
| Categories: |
This homemade costume for women entered our 2023 Halloween Costume Contest.
A word from Eleanor, the 'Edward Scissorhands' costume creator:
Hello! My name is Eleanor and this is me in the photos.
This year I finally decided to go as Edward Scissorhands from the classic movie of the same name. Everything is homemade or upcycled from my closet/thrift stores. I don’t have the receipts for anything I bought, but I will give my best estimates for everything.
First up, the hair. I cut it into a pixie earlier in the year so it would be the perfect length by the time Halloween rolled around. I used a comb to back comb it and a LOT of hairspray. I tried to copy the movie poster and photos from him but mostly I just played with it until it felt right.
For the makeup, I used NYX Can’t Stop Won’t Stop foundation in shade “Pale”, ($15) and the Athena face paint pallet, which I got off of Amazon ($13). Again, I just watched the movie and froze in spots where he was faced forward and tried to copy how his face looked. For the scars, I originally tried to use scar wax. This did not work for me. I practiced with it for weeks but never felt comfortable enough to actually get it to stick/make scars I was happy with. So, in the end, I mixed white face paint with the foundation and used a dark brown eyeshadow to shade around the outside of the scars. A lot of the shading was used with a light hand in the face paint (brown, red, white & purple), and browns and greys from eyeshadow pallets that I already had.
The jacket was made from a deconstructed leather floor length coat that I thrifted from my local goodwill ($8). I do regret the way that I put it together BUT I was still happy with the end result. I tore and cut all of the outside leather using leather scissors from Hobby Lobby ($8) and attached everything to the inside removable lining of the coat. I cannot sew so everything was done with hot glue, velcro and a sh amount of patience.
The jacket that I made was not ideal because I could not lift my arms up more than a slight bend without breaking the glue, but for this character, his clothing is already torn and stitched together over and over again over the years, so luckily for me, it did not distract, but only added to the final look!
The shiny leather pants were from my own closet so they were free but when I bought them, I think they were $15. The waistline on these were not perfect so I was in need of a good friend to pull them up for me throughout the night, but I think they worked and looked great.
I bought a yard of leather from Hobby Lobby ($23) and used almost all of it for the belts & (not pictured) crotch flap that he has. Unfortunately, my jacket was covering it up but it was there and it definitely gave me a diaper feeling through the night haha. I used a lot of velcro ($9), grommets and rings of various sizes ($17), and acrylic paints ($10) to decorate the body belts.
Now, for the hands! I used two different types of reflective silver paper from Hobby Lobby ($12) and painted yellow gardening gloves ($10) with black acrylic paint. I used ellimorph plastic to make the scissor handles ($11). Honestly? That stuff is so fun to work with! I had never used it before but it really was a gag. For the fingers, I followed the shapes from Elli Maes SFX Makeup YouTube channel.
The fingers definitely took the longest to make out of any piece of the costume. I used a lot of hot glue for the fingers and cut out itty bitty pieces to make sure it all fit together as perfectly as I could manage. I mixed different acrylic paints to come up with a rust color to put over all the fingers to add that worn & torn effect.
Finishing out the look were my boots, which were also thrifted ($4)! The rough total for the costume was $155, but the way I felt after finishing and completing a costume I’ve been wanting to do since I was a kid made it priceless!! I got many compliments from my friends and was a big hit at the halloween parties.
I love Edward and even was able to get a friend to dress as Kim for the party (*not entering for couples*) so it was such a fun costume to create. Overall, I spent about two months making and preparing everything so if you want to DIY, I would give yourself a lot of time! It was so fun. I hope you enjoy my Edward as much as I do! Thank you for reading and have a spoooooky Halloween!
Rating: 5.0 of 5. Votes: 1
|
1 vote
|