
by Luisa


Rate this costume:
|
4 votes
| 1 comment · add a comment |
Trying it on completed


| Costume type: | Costumes for Adults |
| Categories: |
This homemade costume for adults entered our 2015 Halloween Costume Contest.
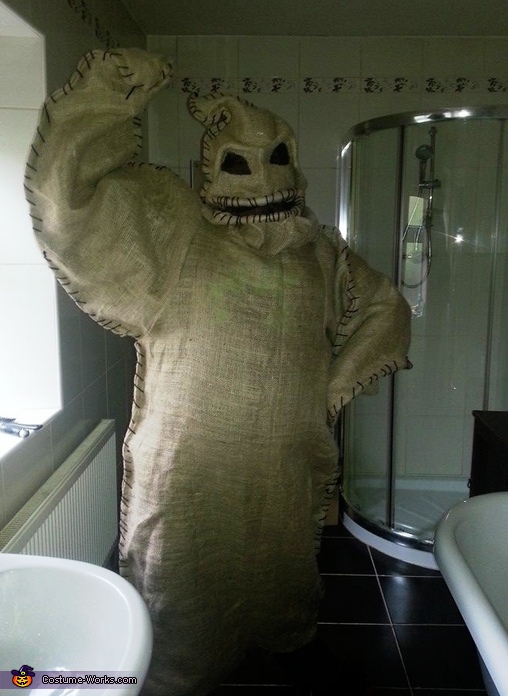
I made this costume for my boyfriend for Halloween and we were really happy with it. A group of us decided to do Disney villains and he decided straight away he wanted to be Oogie Boogie from Nightmare before Christmas. The costume took about 2 weeks to make working on it at night after college for a few hours. It was all handmade by me, no sewing machines or anything were used to make it.
It was made very easily using a few metres of burlap fabric, thread, black yarn, copper wire, a sharpie and tissue paper.
1. I measured out the main body and the arms of my boyfriend and cut the shapes out of the burlap, back and front. Because Oogie Boogie wasn't form fitting it was easy enough to just pick a general large size for it that would still be wearable.
2. The back and front of the body and arms were then stitched together by hand which was definitely a lot harder than the previous step to push a needle through thick burlap over and over! The arms were attached to the body.
3. For the head I cut out 2 large triangles that came to a long point at the end and stitched them together. The point fell naturally to the side and gave it that perfect look.
4. The facial features had to stand out in a 3D way from the face. I got thin bendable copper wire and shaped them into the eyebrows and mouth. I covered them in a few layers of paper towels to prevent the edges ripping the fabric or stabbing into the wearer. I then positioned them on the inside at the areas the eyes and mouth were going to be and stitched them in place. I used a black sharpie to colour in the eyes and mouth.
5. To finish off the look Oogie Boogie was going to need his trademark black stitching all around the edges of him. To do this I got some black yarn and a darning needle and went around all the seams.
6. As Oogie boogie was stitched at the bottom{except for leg holes) the wearer would have to enter from the top of the costume. I simply cut a slit down the back big enough to allow the wearer in and out and used the same black yarn as ties for the back so it would go with the rest of the costume.
7. Finally to give it the final touch I got the leftover burlap and made shoe covers that went up to the knee (inside the costume) and attached to the wearers shoes with some ties (again black yarn) that really finished off the costume
Similar costumes:
Rating: 4.5 of 5. Votes: 4
|
4 votes
|

