
by Heather


Rate this costume:
|
21 votes
| 1 comment · add a comment |
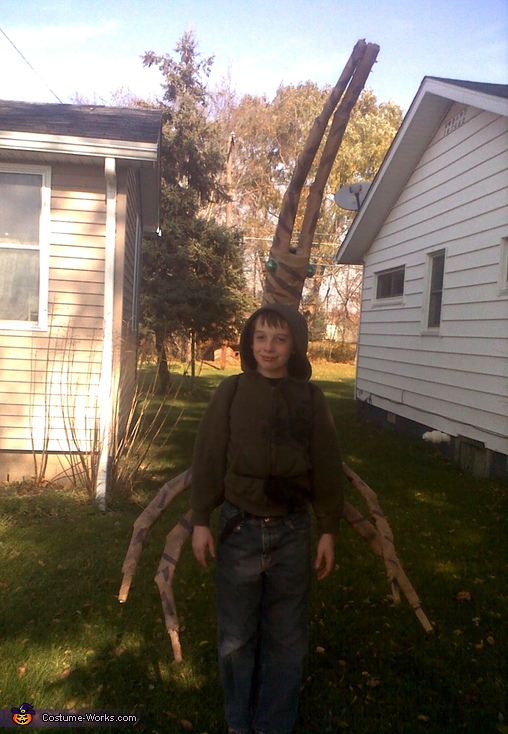
Stick Bug costume


View more insect costumes created by Heather.
| Costume type: | Costumes for Boys |
| Categories: |
This homemade costume for boys entered our 2011 Halloween Costume Contest, and won a special prize in the Most Creative Costume nomination!
I made a total of 13 costumes this year, and we stuck to an "Insect" theme.
One of the costumes was a Walking Stick, (or stick bug). I made it for my oldest son, and it was one of the hardest to make.
Unfortunately, The first one I made was out of one long 6" cardboard tube, with legs and antenna attached by drilling holes and sticking them inside the tube and zip-tying them to stay in place. The idea was sound, but the costume was too heavy, too awkward, and too long (he's on the short side and it dragged the ground. I found this out the Friday before Halloween.
The only choice I had was to start over from scratch, with lighter materials. I also remembered to measure how tall he was to make sure the second one was not too long.
Instruction Illustration Chart
I used corrugated plastic board (the kind convenience/party store use outside for advertising), and a few smaller cardboard boxes.
I cut out sections of the corrugated plastic and rolled it into a hex shape and fastened it together with zip ties. I made each section just a pit smaller so it would fit into the one before it, with about 5 sections all together. I also did this so it would curve along his back and not be so rigid.
I positioned the bug's legs just under his arms, and about the middle of the body. I used some old rubber hose to mount the legs (2 pieces, slid through the body), using the same method I used to make the body.
For the "feelers", I used the same method for making the body, but mounted them to top head part with zip ties to keep them in place. Before I started adding the body covering, I cut slits in the side of the body that would be facing his back and used some strips of black fabric to make straps. I made one set for his shoulders and one set to tie around his waist.
I used spray adhesive and started gluing on tan crepe paper (on clearance for 75 cents, got three rolls). I did three layers. Then I ripped some dark brown crepe paper (again on clearance) and glued them on with the spray adhesive to simulate bark. I also sprayed a bit of black and gray spray paint to blend it a little better.
For the eyes, I used two clears pieces from nylons packages (the 33 cent ones you find at Wal-Mart), covered them with glue and rolled them around in green glitter.
Once everything was dry (paint, glue), I sprayed on a clear coat of paint (to protect from the rain).
He really liked it, and we got a lot of compliments on the uniqueness of it.
P.S. He was supposed to be wearing his camo coat, but he didn't have it on when I took the pictures :(
Similar costumes:
Rating: 4.1 of 5. Votes: 21
|
21 votes
|


