

Starlord and His Mining Pod Costume
Rate this costume:
|
8 votes
| 1 comment · add a comment |
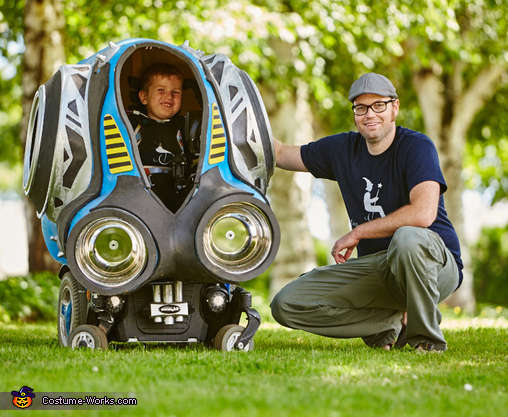
Bryce aka Starlord, dadda and The Mining Pod!


| Costume type: | Costumes for Boys |
| Categories: |
This homemade costume for boys entered our 2016 Halloween Costume Contest.
A word from Ryan, the 'Starlord and His Mining Pod' costume creator:
We built the Indominus Rex for my son Keaton who has apparently tamed the vicious Indominus in order to get around.
The Mining Pod is built around Bryce's's wheelchair. This has been a tradition for us to build whatever costume our kiddo want around their wheelchair since my oldest was 3 and as siblings came for their wheelchairs as well. This has lead us to start a non-profit called Magic Wheelchair. You can check that out here magicwheelchair.org and on Facebook at Magic Wheelchair. It's been a blast and a challenge to build whatever the kiddos want us to build from Indominus to a Mining Pod to a pirate ship to the mighty and fearless Toothless from How to Train A Dragon.
The Mining Pod is made using techniques I learned from The Stan Winston School of Character Arts. They are also a HUGE partner with Magic Wheelchair mentoring our volunteer builders/artists. The Mining Pod was built using foam fabrication techniques working with closed cell foams. You start with a scale sculpt or model of what you are going to build and create patterns off the sculpt much like you would create a sewing pattern. Taking the 3d sculpt into 2d patterns you then glue these patterns together giving the structure. We then add details from various materials one could find at hobby stores and store like Lowes or Home Depot. Painted with latex paints. The "windshield" was built using a buck sculpt and vacuum formed thermoplastics. We added LED lights for some added details.All these techniques are definitely not my own. I learned from the best!! It was a blast to build for sure and took approx. 150-200 hours. Someone more capable could do it quicker I'm sure!!! It's such a blast to fabricate!!! I love it!! I love the challenge and I love what it has allowed me to do. Leading ultimately to building a non-profit that has volunteers all across the country that build for other amazing kiddos and families like mine!!! AWESOME!!! EPIC!!!! Enjoy!!!
Rating: 4.5 of 5. Votes: 8
|
8 votes
|